

If you’ve been searching for how to screenshot on Chromebook and mashing a key that doesn’t exist, you’re not alone.
Chromebooks don’t have a traditional Print Screen button — by design. Instead, ChromeOS uses its own dedicated keyboard shortcut that works on every Chromebook, whether it’s made by HP, Acer, Lenovo, or Dell.
This guide covers every method: the classic keyboard shortcuts, the modern screen capture toolbar, partial screenshots, and what to do when you’re on a school-managed device that plays by different rules. By the end, you’ll never be stuck wondering how to grab your screen again.
No Print Screen Key? Here’s What You Need to Know About Chromebook Screenshots
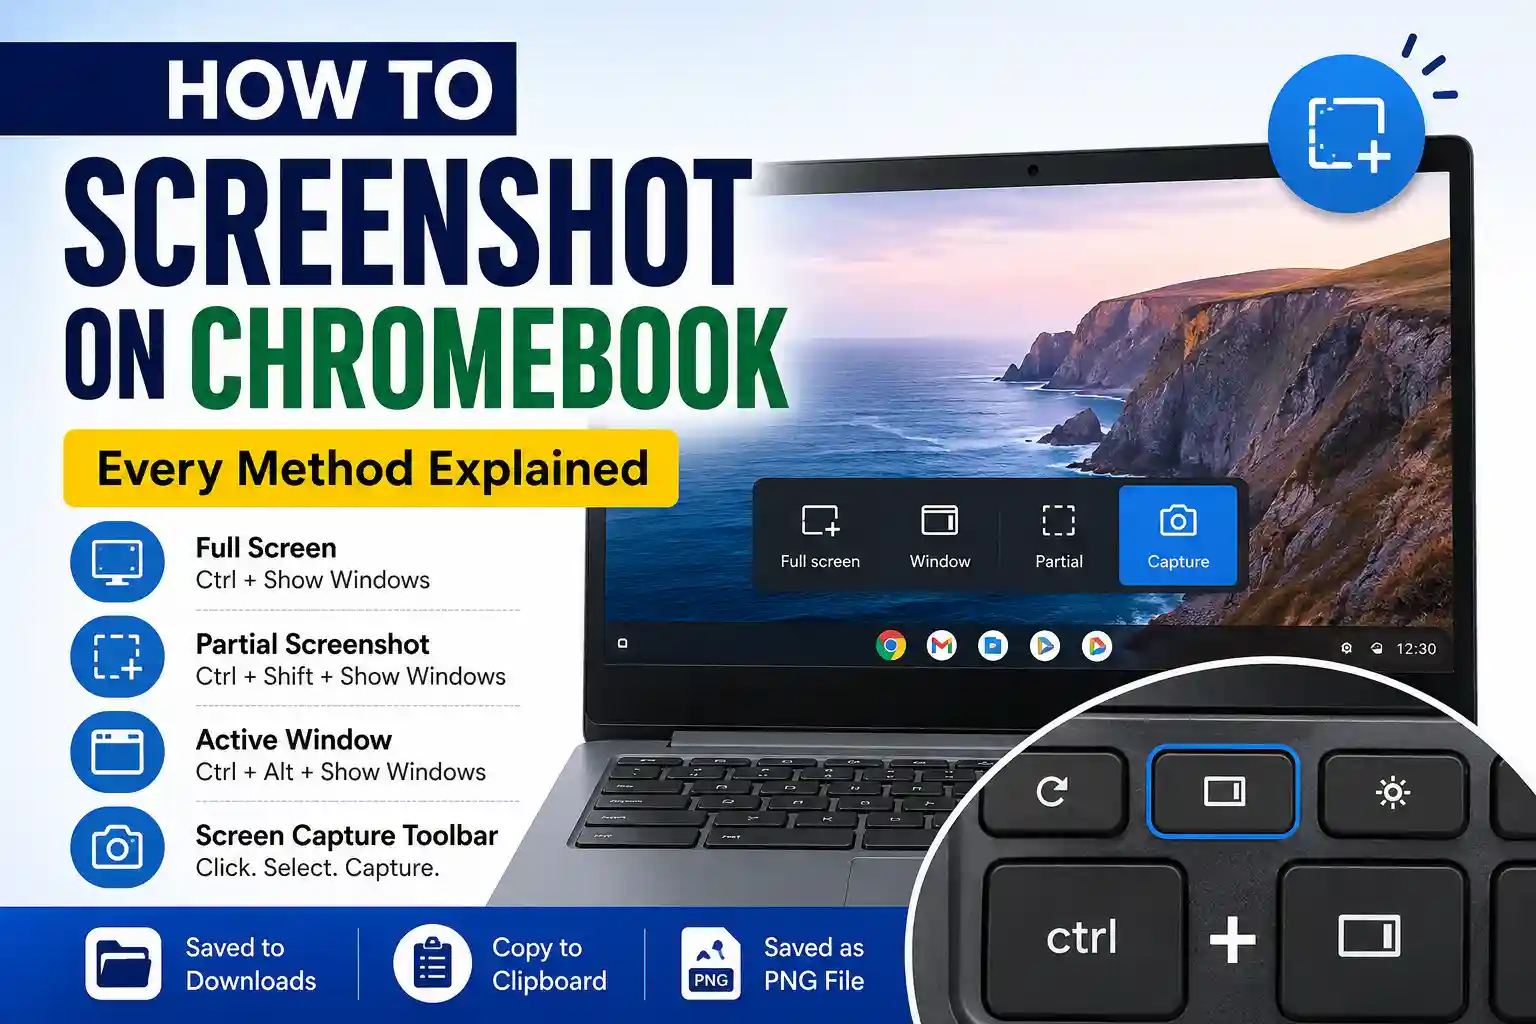
Chromebooks do not include a Print Screen (PrtSc) key. Instead, ChromeOS uses a key called Show Windows — a small icon showing a rectangle with two lines — to handle screenshots. This key sits in the top function row and replaces what Windows users know as F5. Press Ctrl + Show Windows to take a full-screen screenshot instantly.
Why Chromebooks Don’t Have a Print Screen Button
When Google designed ChromeOS, they rebuilt the keyboard from scratch. They removed keys that were irrelevant to a browser-first operating system — including Caps Lock, F-keys, and Print Screen — and replaced them with purpose-built ChromeOS keys.
The result is a cleaner, more intentional keyboard. Instead of a standalone PrtSc key that only does one thing, Google built screenshot functionality directly into a modifier key combination. It’s more powerful and more flexible than what Windows offers by default.
Fun fact: the Caps Lock slot on a Chromebook keyboard became the Search/Launcher key — another bold choice that most users eventually love.
The Key That Does the Job: Meet the Show Windows Button
The Show Windows key is the screenshot trigger on every Chromebook. Visually, it looks like a small rectangle on the left with two vertical lines on its right — representing an open app window with other windows queued behind it.
On most Chromebooks, this key sits in the top row between the Refresh key (a circular arrow) and the Brightness Down key. Its exact position can shift slightly depending on the manufacturer.
| Brand | Show Windows Key Position |
| HP Chromebook | Top row, 5th key from left — between Refresh and Brightness |
| Acer Chromebook | Top row, same position — labeled with the rectangle icon |
| Lenovo Chromebook | Top row — may appear slightly larger icon on Flex/IdeaPad models |
| Dell Chromebook | Top row, consistent with ChromeOS standard layout |
How to Screenshot on Chromebook: The 3 Keyboard Shortcuts That Actually Work
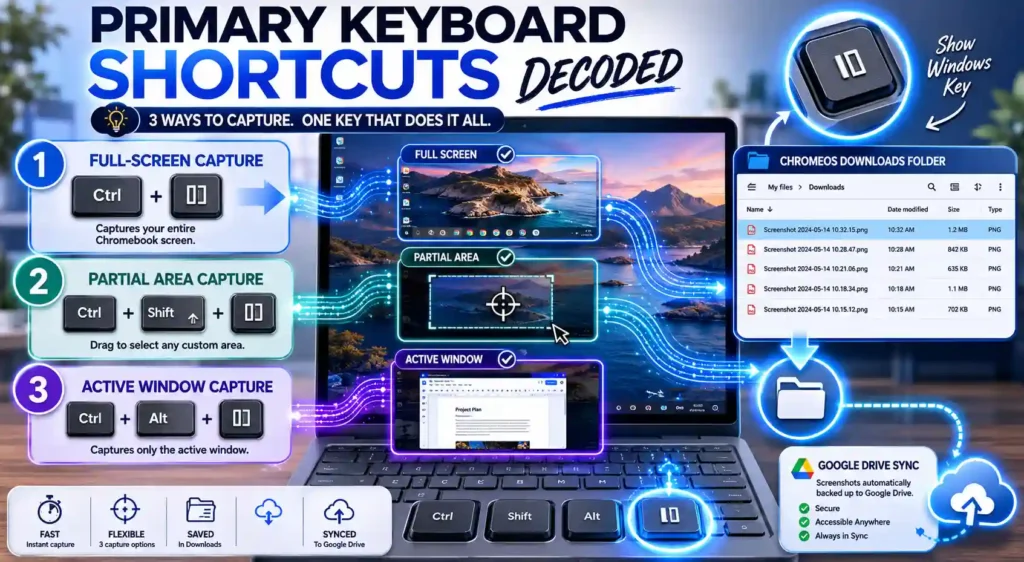
To screenshot on Chromebook, press Ctrl + Show Windows for a full-screen capture. For a partial screenshot, press Ctrl + Shift + Show Windows and drag to select your region. To capture only the active window, press Ctrl + Alt + Show Windows. All screenshots save automatically as PNG files to the Downloads folder.
Method 1 — Full-Screen Screenshot: Ctrl + Show Windows
This is the shortcut you’ll use 90% of the time. Here’s exactly how it works:
- Find the Show Windows key in the top row of your Chromebook keyboard (the rectangle icon with two lines).
- Press and hold Ctrl, then tap the Show Windows key.
- Your screen will flash briefly — that’s the confirmation the screenshot was taken.
- A notification appears in the bottom-right corner. Click it to open the screenshot immediately, or find it later in your Downloads folder.
The screenshot is saved as a PNG file named something like Screenshot 2025-01-15 10.23.45.png — easy to find and share.
Method 2 — Partial Screenshot: Ctrl + Shift + Show Windows
Need to capture just one section of your screen — a specific chat message, a homework question, or one panel in a tab? If you are wondering how to screenshot on Chromebook for a specific area, this is your shortcut.
- Press Ctrl + Shift + Show Windows together.
- Your cursor changes into a crosshair (+) symbol.
- Click and drag to draw a rectangle around the area you want to capture.
- Release the mouse button. The selected region is instantly saved to Downloads.
Pro tip: after pressing the shortcut, take your time — nothing is captured until you drag and release. You can reposition your start point by pressing Escape and trying again.
Method 3 — Active Window Screenshot: Ctrl + Alt + Show Windows
This lesser-known shortcut captures only the currently active window — ignoring your desktop, other open tabs, and the taskbar. Perfect when you have a cluttered screen and only need one app.
Just press Ctrl + Alt + Show Windows and the focused window is captured and saved. No dragging needed.
The Easier Way: Using the Chromebook Screen Capture Toolbar (No Shortcuts Needed)
ChromeOS 89, released by Google in March 2021, introduced a dedicated Screen Capture toolbar. Access it by clicking the system tray (bottom-right clock area), then tapping ‘Screen capture.’ The toolbar lets you choose between screenshot and screen recording modes, and select full-screen, window, or partial capture — all with a single click.
How to Open the Screen Capture Tool from the System Tray
If keyboard shortcuts aren’t your style — or if you’re helping someone who prefers clicking over hotkeys. The screen capture toolbar is the friendliest option for how to screenshot on Chromebook without using keys.
- Click the time/battery/Wi-Fi area in the bottom-right corner of your screen to open the System Tray.
- Look for the Screen capture icon (it looks like a small camera or screenshot symbol).
- Click it. A small toolbar appears at the bottom center of your screen.
- Select your mode: Screenshot (camera icon) or Screen record (video icon).
- Choose your capture type: Full screen, Window, or Partial.
- Click to capture. Done.
This toolbar was introduced specifically because Google noticed users struggling to remember shortcuts. It’s available on any Chromebook running ChromeOS 89 or later — which covers virtually every Chromebook sold after early 2021.
Screenshot vs. Screen Record: Choosing the Right Mode
The toolbar neatly separates two features that people often confuse:
- Screenshot mode captures a still image of your screen — saved as a PNG to Downloads. Best for sharing what you see right now.
- Screen record mode records a video of your screen — saved as a WebM video. Best for tutorials, gameplay captures, or recording a video call (with appropriate consent).
You can toggle between them with one click inside the toolbar. If you accidentally start recording when you wanted a screenshot, the toolbar shows a red recording indicator in the system tray — click it to stop.
Where Do Screenshots Go on a Chromebook? (It’s Not Where You Think)
Screenshots on a Chromebook are automatically saved to the Downloads folder — not the Desktop, which does not exist as a standard location in ChromeOS. To find your screenshots, open the Files app from the app launcher, then click ‘Downloads’ in the left sidebar. Look for PNG files with names beginning with ‘Screenshot’ followed by a date and time.
Finding Your Screenshots in the Files App
New Chromebook users often panic after taking a screenshot because they can’t find it. There’s no Desktop icon. There’s no pop-up asking where to save. The file just… appears in Downloads.
Here’s how to get there:
- Press the Search key (magnifying glass icon) or click the Launcher icon in the bottom-left corner.
- Search for ‘Files’ and open the Files app.
- In the left sidebar, click ‘Downloads.’
- Look for your PNG file — files are named ‘Screenshot [YYYY-MM-DD] [HH.MM.SS].png’
You can also right-click any screenshot to copy it, move it to Google Drive for cloud backup, or share it directly via Gmail or Google Chat.
How to Copy a Screenshot Directly to Clipboard (Skip the Save)
Sometimes you don’t need the file — you just want to paste the screenshot somewhere. This is a great trick for how to screenshot on Chromebook when teachers and students need to paste images quickly into Google Docs or Slides.
After taking any screenshot with the keyboard shortcuts, a preview notification appears in the bottom-right corner. Click ‘Copy to clipboard’ from that notification, and the image is ready to paste anywhere with Ctrl + V — without cluttering your Downloads folder.
Alternatively, the screen capture toolbar has a clipboard option built in.
How to Screenshot on a School Chromebook (And What to Do If It’s Blocked)
To screenshot on a school Chromebook, press Ctrl + Show Windows — the same shortcut as any other Chromebook. However, school-managed Chromebooks run under Google Admin Console policies set by your school’s IT department. If screenshots are disabled by admin policy, the shortcut will not work and there is no workaround available without contacting IT directly.
Why School Chromebooks Sometimes Block Screenshots
School Chromebooks are ‘managed devices’ — meaning a school administrator controls what features are available through Google Admin Console. Admins can enable or disable screenshot functionality district-wide or for specific grade levels.
Common reasons screenshots get disabled:
- Preventing students from capturing exam or test questions
- Protecting student privacy in video calls and shared sessions
- Reducing distractions during class time
If you try Ctrl + Show Windows and nothing happens, or a notification says the feature is unavailable, the shortcut has been disabled by your school.
What to Do If the Shortcut Doesn’t Work on Your School Device
Your options when the screenshot shortcut is blocked:
- Contact your school’s IT department and explain why you need the feature — for a class project, assignment documentation, etc.
- Use your phone camera to photograph the screen (not ideal, but it works for quick reference).
- Ask your teacher if there’s an approved method for capturing content — some schools enable it on a case-by-case basis.
Trying to bypass school admin restrictions using developer mode or third-party extensions is not recommended. It likely violates your school’s acceptable use policy and could result in the device being reset.
Can Schools See Your Screenshots? The Honest Answer
This is one of the most-asked questions in student forums — and the honest answer is nuanced.
School administrators cannot automatically view screenshots you’ve taken through any built-in ChromeOS feature. Screenshots save locally to your Downloads folder, just like on a personal device.
However, if your school uses monitoring software (like GoGuardian, Securly, or Bark), that software may periodically capture screenshots of the active screen and send them to administrators. This is separate from the screenshot shortcut — it’s the software doing the capturing, not you.
Bottom line: learning how to screenshot on Chromebook and taking a capture does not send anything to your school. But if monitoring software is active, your general screen activity may be visible to IT staff or administrators during school hours.
Chromebook Screenshot by Brand: HP, Acer, Lenovo, and Dell — What’s Different?
The screenshot shortcut is identical across all Chromebook brands: Ctrl + Show Windows for full-screen. The only difference is where the Show Windows key physically sits and what it looks like. HP, Acer, Lenovo, and Dell all use the ChromeOS standard keyboard layout, but the icon rendering and key size can vary slightly between models.
Screenshot on HP Chromebook
HP Chromebooks — including the popular HP Chromebook 11 and HP Chromebook x360 — follow the standard ChromeOS keyboard layout exactly. The Show Windows key is the 5th key from the left in the top row, sitting between the Refresh key (circular arrow) and the Brightness Down key.
On HP’s keyboard, the Show Windows icon is clearly rendered and easy to identify. The full-screen shortcut is Ctrl + Show Windows; partial is Ctrl + Shift + Show Windows. No HP-specific quirks.
Screenshot on Acer, Lenovo, and Dell Chromebook
All three brands use the ChromeOS standard keyboard, so the Show Windows key is in the same position as HP. The only variation is cosmetic:
- Acer Chromebooks: The Show Windows icon is slightly smaller and rendered in silver on most models. Identical function.
- Lenovo Chromebooks: On IdeaPad Flex and Duet models (2-in-1), the keyboard may be a detachable or folding type. The Show Windows key is present in the top row. On tablet mode, use the screen capture toolbar from the system tray instead.
- Dell Chromebooks: Mostly used in educational settings (the Dell Chromebook 3100 is a school staple). The layout is standard. Screenshot shortcuts work identically.
If you have an older Chromebook (pre-2017), the Show Windows key may be labeled differently or positioned slightly to the right. The keyboard shortcut logic remains the same.
Quick Reference: All Chromebook Screenshot Methods at a Glance
| Shortcut / Method | What It Does |
| Ctrl + Show Windows | Full-screen screenshot — saves to Downloads as PNG |
| Ctrl + Shift + Show Windows | Partial screenshot — drag to select a region |
| Ctrl + Alt + Show Windows | Active window screenshot — captures only the focused window |
| Screen Capture Toolbar | Click system tray > Screen capture — visual, no shortcut needed |
| Clipboard copy | After screenshot, click ‘Copy to clipboard’ in the notification |
Ctrl+L, Ctrl+Alt+Z, Ctrl+Shift+B: What These Actually Do (Hint: Not Screenshots)
A lot of confused Chromebook users end up searching these shortcuts alongside screenshot queries. Let’s clear them up once and for all.
- Ctrl + L — Selects and highlights the URL in Chrome’s address bar. Useful for quickly copying a page URL. Has nothing to do with screenshots.
- Ctrl + Alt + Z — Toggles ChromeVox, Google’s built-in screen reader accessibility feature. If this shortcut fires accidentally, press it again to turn ChromeVox off.
- Ctrl + Shift + B — Toggles the Chrome bookmarks bar on and off. Again, unrelated to screenshots.
These shortcuts come up in search results because they’re frequently searched alongside Chromebook screenshot queries. None of them capture your screen.
Now You Know How to Screenshot on Chromebook Every Way That Matters
Whether you’re a student grabbing a question for study notes, a new Chromebook owner migrating from Windows, or a teacher documenting something on screen now you have every tool in your kit.
The core shortcut is simple: Ctrl + Show Windows lets you how to screenshot on Chromebook instantly. For more control, Ctrl + Shift + Show Windows lets you select exactly what you need. And if shortcuts aren’t your thing, the ChromeOS Screen Capture toolbar puts everything one click away from the system tray.
Screenshots land in your Downloads folder, named with a timestamp, and ready to share or copy to clipboard within seconds. Whether your Chromebook is made by HP, Acer, Lenovo, or Dell, the same consistent keyboard logic applies across every model.
One final note for students on school devices: if the screenshot shortcut doesn’t fire, that’s your school’s admin policy at work — not a broken Chromebook. Reach out to your IT department, and you’ll get it sorted.
Happy screenshotting.
